

The 2000 Honda Civic stands as a testament to automotive excellence. Renowned for its reliability and versatility, this model has captured the hearts of car enthusiasts worldwide. Its enduring appeal lies in its ability to blend everyday functionality with the potential for customization, making it a favourite among those seeking efficiency and personal expression in their vehicles.
For vehicle enthusiasts and owners passionate about customizing their cars, the 2000 Honda Civic presents a canvas ripe with possibilities. Whether it's lowering the stance, modifying the body for aesthetic appeal, or enhancing performance, this model offers a perfect blend of simplicity and potential. Keep reading to learn how to install Honda Civic dash/air pressure gauges and an air suspension ride kit.
Why Do It?
When it comes to customizing a 2000 Honda Civic, installing new dash and air pressure gauges can significantly enhance both the vehicle's functionality and interior aesthetics.
Enthusiasts and aftermarket parts dealers alike find that these additions provide vital information about the car's performance and offer a personalized touch to the cockpit.
Following these directions will help you navigate through the procedure's particulars, making clear the practical benefits of these enhancements. Remember, installing new gauges in your Civic is not just about the visual upgrade; it’s about keeping a closer eye on your car's critical systems.
Preparation and Precautions
Preparation is paramount before embarking on the installation. Begin by collecting the necessary tools and materials: screwdrivers, wire crimpers, electrical tape, and, of course, the new gauges. Make sure your work area is clean and well-lit to avoid any mishaps. Disconnect the negative battery terminal to prevent electrical short circuits during the installation.
Keep the Civic's manual close by. It will be an invaluable resource when locating specific panels and wiring. Also, ensure you are familiar with the electrical system of your car to avoid any incorrect connections. Safety comes first; don't rush, and double-check each step before proceeding.
Gauge Selection and Placement
Choosing the right gauges is not just a matter of personal preference; it's about compatibility and integration with your Civic. Consider factors like size, backlighting, and sensor compatibility. You'll want gauges that fit seamlessly into the existing dashboard and match its illumination for a consistent look.
Once you have the gauges, decide on their placement. The Civic's interior design may offer multiple options, and while the classic choice might be the central console, you should select a position that keeps the gauges within your natural line of sight. This ensures you can monitor readings without distraction while driving.
Wiring and Installation
Attaching the gauges properly involves more than just physical placement. Wiring is the crux of functionality. Begin by routing the wires from the new gauges to the car's electrical system. Follow the Civic's wiring diagram to pinpoint where each wire should be connected for power, ground, and sensors.
After wiring, secure the gauges. Depending on the model you've selected, this might involve snapping them into a mounting bracket or screwing them directly onto the dashboard. Ensure they are fastened tightly to prevent movement that could lead to inaccurate readings or damage.
Calibration and Testing
Calibration is the key to accurate readings. Follow the manufacturer's guidelines to set each gauge to its base reading. This process might involve specific actions with the vehicle, like revving the engine or hitting certain speeds. Once calibrated, test the gauges while the car is stationary to ensure they respond correctly to changes in engine behavior.
It's prudent also to conduct a road test. Monitor the new gauges in real driving conditions to check for consistency and reliability. Look out for any discrepancies or erratic behavior, which could suggest loose wires or calibration issues. Adjust as needed until the gauges provide reliable readings across different driving conditions.
Our Pick of Honda Civic Products
Airbagit 1996-2000 Honda Civic Built-In Dash/Air Pressure Gauges
Enhanced Monitoring and Style
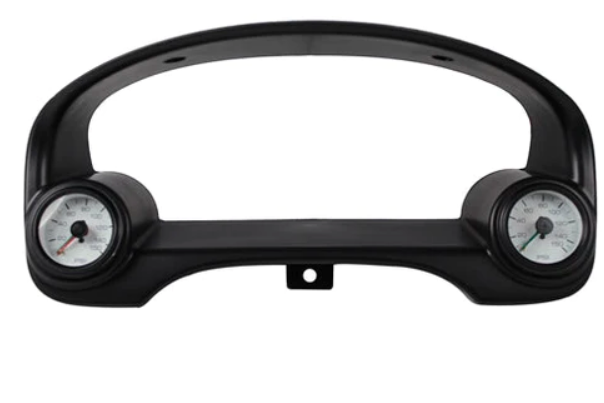
The Airbagit Built-In Dash with Air Pressure Gauges for the 1996-2000 Honda Civic is an exemplary fusion of functionality and style. This product, priced at $98.20, is tailored for the discerning Honda Civic owner who values precision in monitoring their vehicle's air suspension system.
The integrated design of these gauges ensures a seamless fit into the Civic's dashboard, enhancing the interior's aesthetic while providing vital information at a glance.
Technical Excellence
The gauges are engineered to deliver accurate readings, a crucial feature for maintaining the optimal performance of an air suspension system. This accuracy not only aids in achieving the desired ride quality but also plays a vital role in preventing potential damage due to over or under-inflation.
The ease of installation and user-friendly interface make these gauges ideal for both seasoned enthusiasts and newcomers to car customization.
2000 Honda Civic Upgrade: Final Thought
With the new dash and air pressure gauges installed, your Civic's interior will be upgraded, and you will gain deeper insight into its performance.
After installation, remember that maintenance is essential. Regularly clean the gauge faces and check the connections to avoid problems down the road. Over time, sensors may need recalibration, especially if you make further modifications to the engine or suspension.
Check out our selection at Airbagit.com and get the best products on the market!
Join our social media communities on Facebook and Instagram for the best tips and deals in the industry!